How to take a screenshot
When you have a website issue or need to ask a question, a speedy resolution is often facilitated by supplying clear screenshots showing what's happening on your screen.
There are many other instances where its handy to share a screenshot with a friend or colleague.
If you are using a Windows PC, the quickest way to share what's on your screen is to utilise the in-built "Snipping Tool" function. Snipping Tool is quicker and less tedious than using the "PrintScreen" button and then having to paste into a Word document or Powerpoint slide. IT also enables you to share only the relavnt part, not the entire screen, and lets you highlight the area you wish to draw attention to.
*How to use Snipping Tool to take a screenshot: *
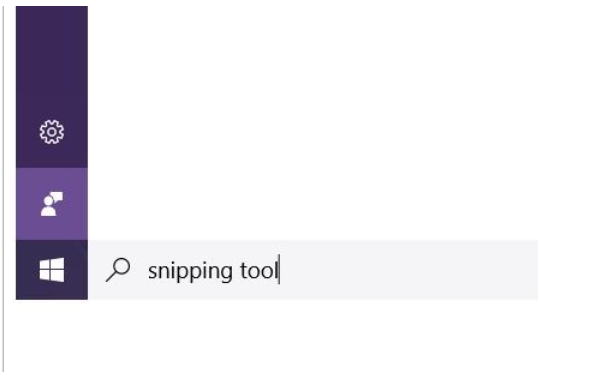
- Click on the windows icon at bottom left of screen
In the search box type "Snipping Tool"

Click on the "Snipping Tool" icon and press "New"

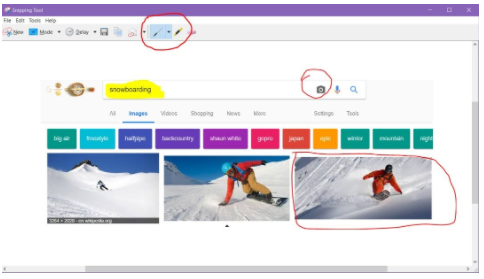
Drag your cursor from the top left, to the bottom right to make a box that you wish to capture. As soon as you release the mouse button, the trimmed box will appear on screen and you can use the File> "Save As" option to save it to your desktop (ready to attach to Redmine) and/or you can copy the image to your clipboard and paste it directly into an email (NB: you cannot paste directly into Redmine)/
You can use the handy highlighter and pen tools to mark areas that you wish to draw attention to

PRO TIP (optional recommendation) -Pin the "Snipping Tool" to your Windows taskbar (the bar that goes along the bottom of your screen). We recommend this because Snipping Tool is such a useful feature that you'll find yourself using it all the time.


sub-pages
0 0