How to Send Group Emails (inc Launch Emails)
Related Topics:
How do I use the email content builder - e-newsletters?
How to build new e-newsletters/communications
How do I create mail-merged letters?
How do I Email a PDF as an Attachment?
How do I create/edit an email header?
How do I create a scheduled email e.g. a birthday email?
Which email templates are available to me?
How to build e-newsletters using existing news and events?
Database Search - Making the most of your data
Introduction
The ability to send group emails to your members is one of the many functions that our product offers and one that you are likely to find most important to your organisation. It is quick, free and is often the preferred method for people to receive correspondence. All group emails sent using Potentiality are automatically stored against the Communication tab within a member's record and held within the Communication Log (found under Events/Comms on your admin tools menu) for future reference.
You are able to send emails out to all of your members at once or you can specify a target group to receive an email. You may also create personalised emails using mail merge links along with direct login/one click consent links (where appropriate). See How can I create personalised emails/insert direct log in points? for more details.
You may also email a group of individuals who are NOT members of your community. See Using the Bulk Mail List below.
You can view our short basic video on sending group emails below or follow the step by step instructions further down this page.
Sending a group/launch email to users
Emailing a group of users is a two-step process which can be started from either the search page OR from the communications page.
One step is to create a database query; this involves entering the search criteria in order to retrieve the details of those you wish to email and the other is to compose the email within the comms hub.
OPTION ONE
To email a group of users via the search page:
- Go to Admin Tools menu > Users > Search.
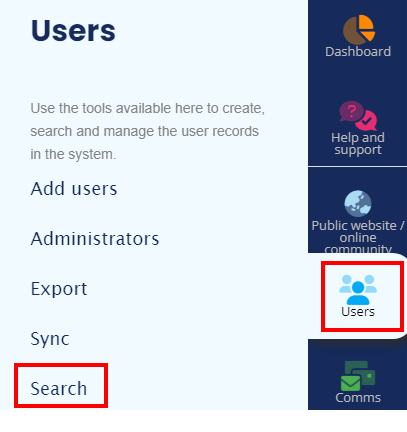
- The Search the database screen will display (see below).
STAGE ONE
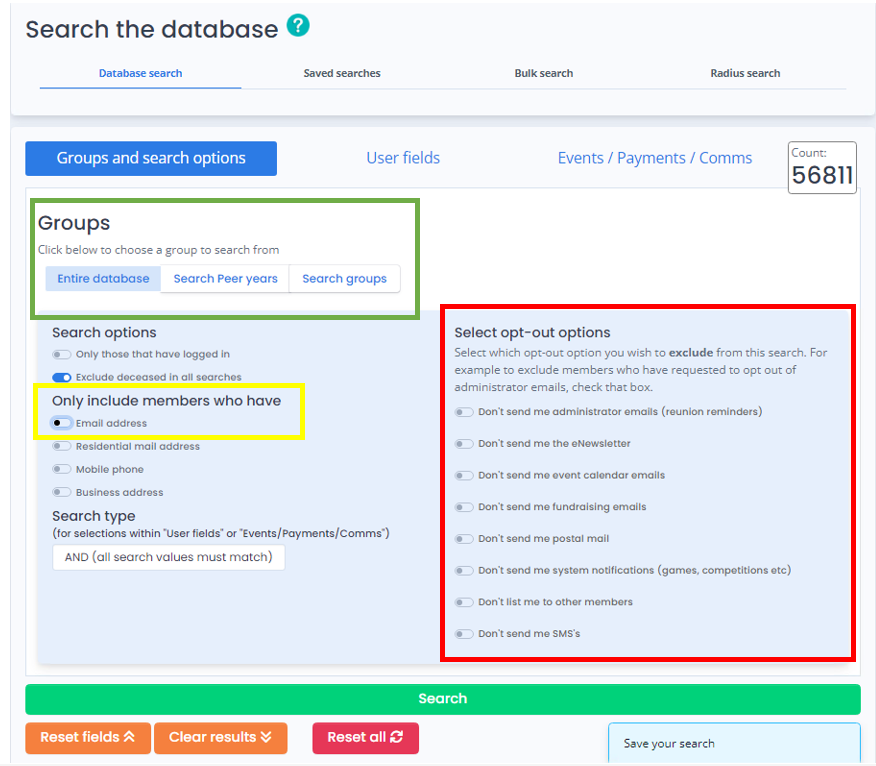
The first stage is deciding which groups you plan to email. There are three groups available (see green highlighted option above):
- Entire Database: This is everyone on your database, excluding deceased, this option is selected by default.
Whether you are emailing the entire database or a small group of people, we would recommend that you select Email address under Search options (highlighted in yellow above). This will filter your search to only include those who have an email address. This is an important step, otherwise, you may believe that you are emailing 5000 members when in fact only 3000 of those members have an email address.
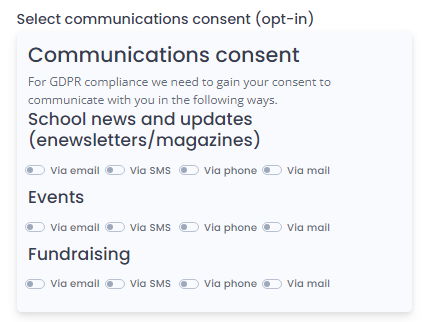
Your next step will depend upon which consent options you've chosen to apply across your site - in other words -
- Are you only contacting those who have OPTED IN to receive comms OR
- Are you only contacting those who have NOT OPTED OUT?
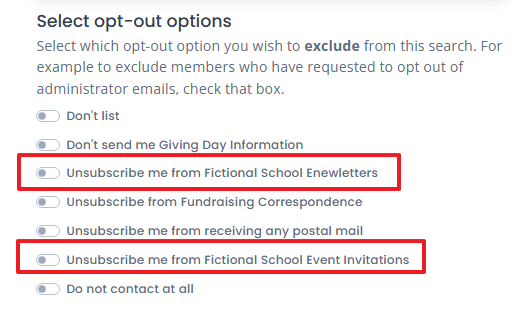
NOTE: You MUST apply the appropriate filters below to include or exclude a member based on their subscription preferences. For example, if you are only contacting those who have NOT opted out then you must select the relevant filter highlighted above in red. By selecting one or more of these filters, those who have opted out will then be EXCLUDED from your search/email.
If you don't, the default will be to include ALL records in the resultant search, including those who have unsubscribed.
If you have chosen not to follow the 'opt-in' approach above, you MUST tick the relevant filters below from the 'Select opt-out options' instead to ensure that those members who have chosen to unsubscribe from your emails are excluded from your search results, to avoid you inadvertently emailing them by mistake.
Click the User fields tab (where required) to add additional filters to narrow down your search.
NOTE: The count in the top, right-hand corner updates every time you add to/amend a search; to show you how many members meet the criterion that you've entered (see above)Click Search to return all members who meet your inputted criteria. A screen which looks similar to the one below will be displayed:
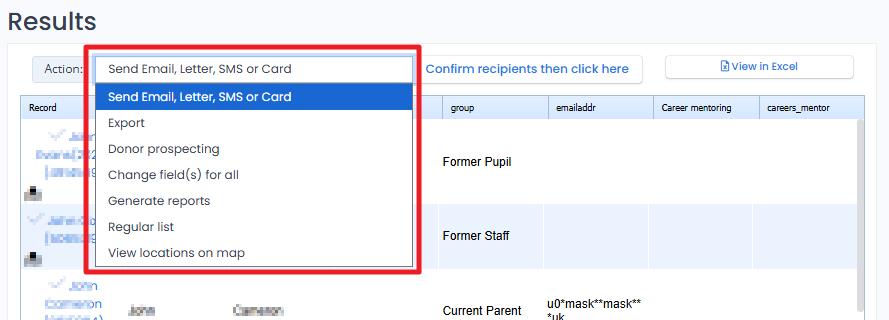
(Optional) If required, remove any specific members from the list by clicking on the relevant row (the row will become red to represent that this individual is no longer included within this email).
Under the Action menu highlighted above. The default option is Send Email, Letter or Text Message. Therefore there is no need to touch the drop-down menu, simply click Confirm *recipients then click here.*
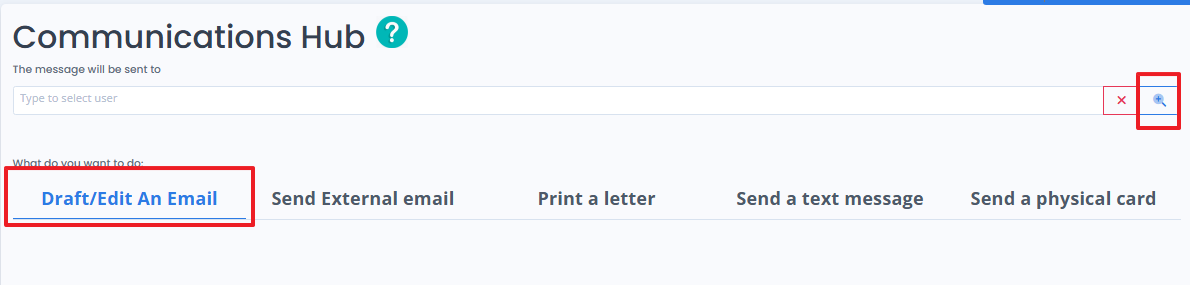
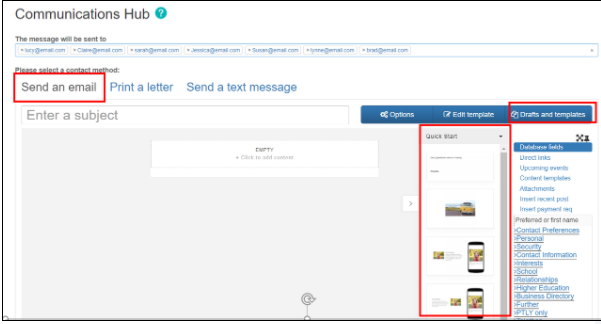
The Communication Hub screen will appear. Click Draft/Email An Email link highlighted below is begin composing your email.

The name of the email recipient(s) will be displayed at the top of the screen.
NOTE: All bulk emails are sent BCC. This means that members cannot see one another’s email addresses.
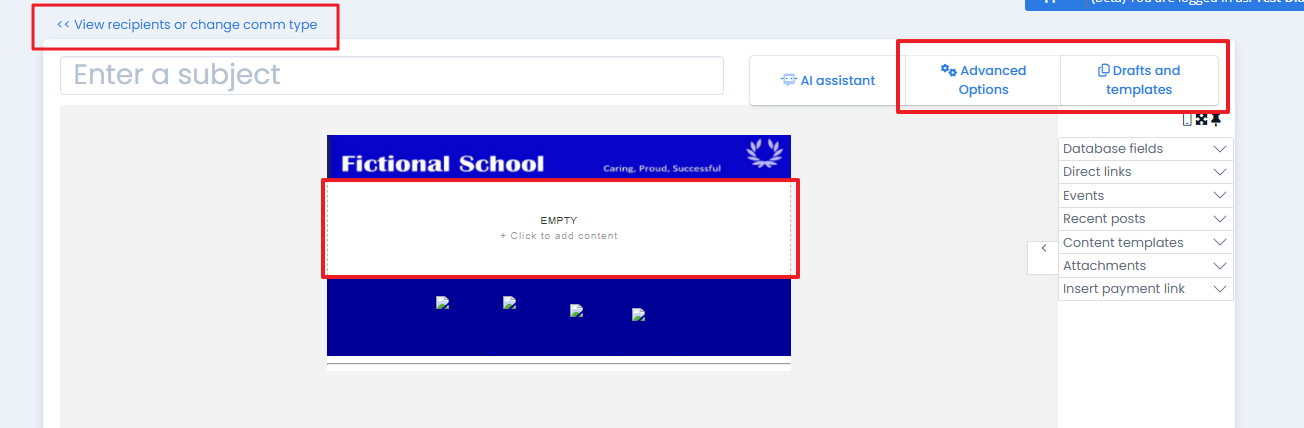
You have several options available to you at this stage. You can:
a. Go to Drafts and templates to select an existing email template or draft. You will have advanced options available to you. Please see Advanced email options explained for more information.
b. Create an email from scratch by dragging and dropping elements from the Quick Start menu. This will be displayed upon clicking on the arrow highlighted in the screenshot below:
c. Build your email by clicking the Empty - Click to add content button. (see How do I use the email content builder - enewsletters? for more details).
In the Subject field, type in a suitable title for your email.
Enter some suitable content.
(Optional) personalise your email(s) and/or insert direct login links by hovering over the list of mail merge fields on the right-hand side of your screen and clicking on the relevant fields that you'd like to insert/
NOTE: Click on the pin (highlighted above) to keep the menu in place.
(Optional) If you hover towards the bottom of your screen, there will be an option to send a test copy of the email to yourself before sending it to members, click Send text copy now to only you.
(Optional) To save the email as a template for future use, type a name for the template under the Save email as draft section located on the bottom right-hand corner of the screen > tick the Save as a template (if you want said template to be available to others) checkbox > click Save email.
NOTE: If you simply enter the name of the email and click 'Save' WITHOUT selecting 'Save as a template (will be available to others)' checkbox; the email will be stored as a draft and will only be accessible to you.
(Optional) To anonymously copy yourself into the email, tick the BCC to self-check box.
When your message is ready to send, click Send Message.
NOTE: We have an email ‘Bounce Handler’ which moves invalid emails from the Email address database field to the Previous email address field. This means that members are not included in future bulk emails if their email address consistently fails to deliver, but the email addresses are not lost, just moved.
A confirmation page will appear to let you know whether your email has successfully been sent.
To email a group of users via the communications page:
Go to Admin Tools menu and select Comms > Comms drafting/templates saved emails.
The following screen will appear and selecting the magnifying glass will take you to the search screen as per steps 1-6 above:
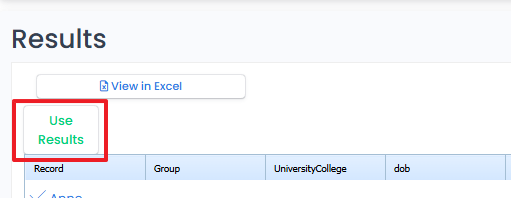
- Once the search results contain the names of all of the users that you would like to contact, press the green Use Results button.
- You can now continue from step 9 above.
Alternatively, if you wish to send to a list of email addresses that are NOT members on the system (and should not have profiles on the system) you can use the Bulk Mail List.
Using the Bulk Mail List
Click on Non-Member Contact List under the Communications and Notes heading on the admin tools menu found at the left of your screen. A screen similar to the one below will display:
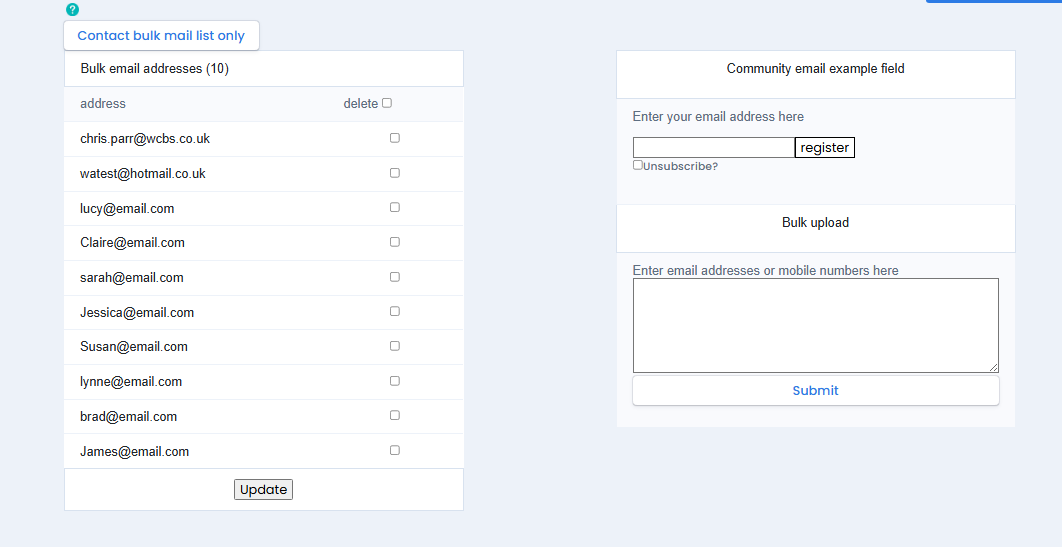
You can add an individual email to the non-member contact list by entering a single email address into the email address field at the top of the screen and clicking register.
To add multiple email addresses, either enter them manually or copy and paste them into the Bulk Upload box on the right-hand side (using a semicolon or a new line between each email address) and click Submit. These emails will now be available on the Bulk email addresses on the left-hand side of the screen.
Click Contact bulk mail list only (near the top of the screen) to email everyone on the list. You will be taken to the standard email screen below.
You have several options available to you at this stage. You can:
a. Go to Drafts and templates to select an existing email template or draft.
b. Create an email from scratch by dragging and dropping elements from the Quick Start menu.
c. Build your email by clicking the Empty - Click to add content button. (see How do I use the email content builder - enewsletters? for more details).
When your message is ready to send, click Send Message.
A confirmation page will appear to let you know whether your email has successfully been sent.
sub-pages
sub-pages
The following is a summary of this video:
`This video provides a tutorial on sending group emails using a specific platform. Here’s a concise summary and instructions to replicate the tasks demonstrated:
Summary:
The video explains two methods for sending group emails: drafting the email first or selecting recipients first. It covers creating and saving email templates, adding content such as paragraphs, headlines, images, and events, and managing recipient lists. The tutorial also highlights the importance of including opt-out options for recipients and personalizing emails with recipient names.
Instructions:
- Drafting an Email:
*   Navigate to the communication section and select "Drafting Templates."
*   Choose "Draft an Email" and enter a subject.
*   Enable "Save automatically as you type" to prevent data loss.
*   Add content (paragraphs, headlines) and drag-and-drop events or news items if needed.
*   Save the draft as a template if you wish to reuse it later.
- Adding Content:
*   Use the drag-and-drop feature to add images or change their order.
*   Customize text and images using the provided tools.
*   Save your draft with a specific name for easy retrieval.
- Setting Advanced Options:
*   Choose a reply address for the email.
*   Select an appropriate opt-out field for recipients to unsubscribe if needed.
- Selecting Recipients:
*   Use the search feature to filter recipients by email address and communication consent.
*   Exclude recipients based on certain criteria, such as those unsubscribed from specific correspondence.
*   Use groups to target specific segments like alumni or staff.
- Sending the Email:
*   Ensure the email is personalized by adding placeholders for recipient names.
*   Verify the number of recipients before sending.
*   Use the "Send Message" option to dispatch the email.
- Alternative Method:
*   Conduct a search for recipients first, then draft the email.
*   Use the "Send Email Later" option from the search results.
*   Exclude specific individuals from the recipient list if necessary.
By following these steps, users can efficiently create and send group emails while ensuring personalization and compliance with communication preferences.`
sub-pages
0 0